Step by step guide
Install Normalink
We explain how to install a Normalink system for the control of a DALI lighting installation with universal elements.
Connect all the luminaires, both general and emergency lighting to the DALI line. Make sure that all the fittings are connected to the power supply.
- Wire 2x1.5mm2.
- Maximum distance 300 meters.
- No polarity.
- Up to 64 fittings (per DALI line).
- Star connections are allowed.
- Closed loops are not allowed.
- Isolated BUS.
- Maximum no of groups per line: 16
- Maximum number of scenes per line: 16.
Connect the DALI line to the IDNG64 gateway and press the test button. All the luminaires connected to that gateway should blink. If some of them are not, this could be because:
- It is not properly connected to the DALI line.
- It does not have power supply
- It has a functioning defect
- It is not 100% DALI.
By pressing a second time the test button the blinking of the fittings will end. This will also end automatically after 15 minutes if you forget to press the button again.
In this step you can also connect to the DALI line those devices that allow the connection of external elements, such as the IDNG- EAD adapters and / or IDNG-P4P interface. Remember that these devices do not occupy a DALI address and that the maximum number you can connect to a single DALI line is 16.
Now its time to configure the network parameters of the Normalink devices to allow their integration in the local network of the installation.
Using a computer and an ethernet corssover cable:
- Connect the wire to each fitting.
- Open the web browser of the computer and introduce the default IP address of the device.
Remember that the computer should be in the same range than the one the device to be configured is.
From the Webserver of the device you will be able to modify the network parameters and add information that will allow its identification in the upcoming steps. For example, you can define now in which zone or building it is installed.
Devices that will require this configuration:
- IDNG-64.
- IDNG-MG.
- IDNG-10ES.
The Normalink app is available for devices compatible with IOS, Android and Windows. You can download it for free from the AppleStore or Google Play. To receive the Windows version, please send an email to normalink@normagrup.com and we will send it to you for free as well.
Once downloaded and installed, open it. Please indicate whether you are locally or remotely connected.
Afterwards, choose one of the three available user profiles:
- Standard user.
- Maintenance user.
- Administrator.
The system will automatically search for network devices compatible with Normalink and will group them by "Building" or "Zone" (if they were given a building or zone in Step 2).
When pressing over a zone or building, we will get access to its control and supervision, with the following information displayed. Number of fittings, events in the installation and a button that grants access to general configuration.
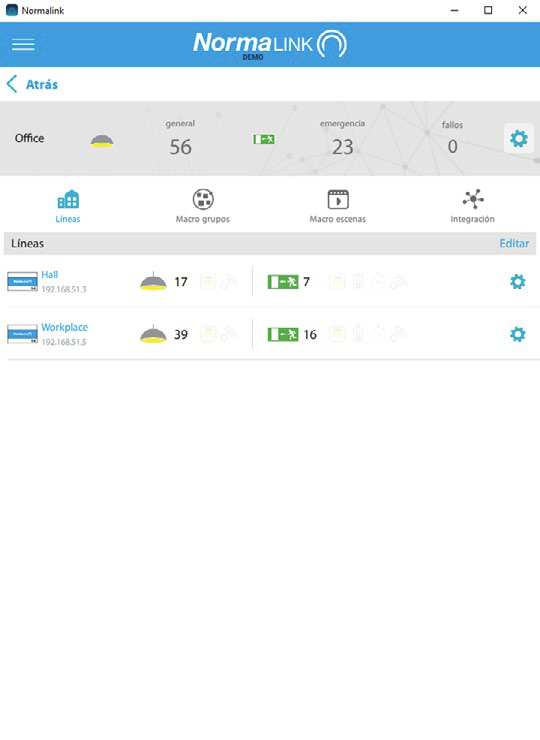
There are four buttons on this screen to access different sections:
- Lines: A list of Normalink devices with the number of luminaires and events on the installation, as well as an access to its configuration.
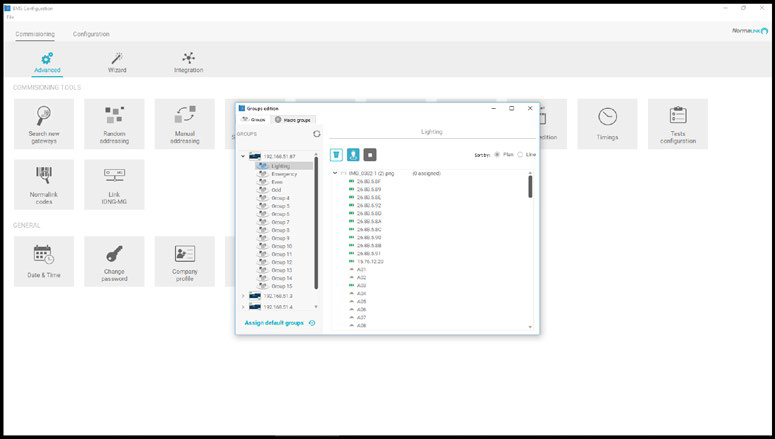
- Macro Groups: Groups of luminaires from different gateways for a global control.
- Macro Scenes: Actions over groups from different gateways.
- Integration: Detection and configuration of external elements.
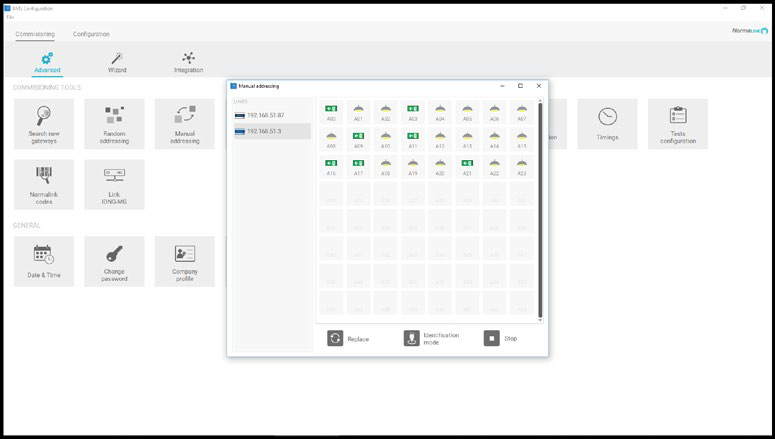
The DALI random addressing can be done globally (all gateways at once) from the general configuration menu or individually (gateway by gateway) from the configuration menu of each gateway.
The random addressing does the following:
- Detects the DALI fittings (general or emergency lighting)
- Erases previous DALI IDs in the fitting, should there be any.
- DALI addressing from 0 to 63.
- Reading of the type of luminaire (General lighting or emergency lighting)
- Basic agrupation.
Normalink creates by default the following ():
- Group 0: General Lighting.
- Group 1: Emergency Ligthing.
- Group 2: Emergency lighting with even addresses.
- Group 3 : Emergency lighting with odd addresses.
By pressing over an IDNG-64 gateway you can access the control of the luminaires connected to that particular gateway and will be able to::
- Manage each fitting individually or globally (establish maximum or minimum levels of lighting, turn off or set a determined % of illumination.
- Get information about any event that occured either in the general or emergency lighting.
- Control of DALI groups.
- Control scenes.
- Consult the programmed timings and the ones that are currently being used.

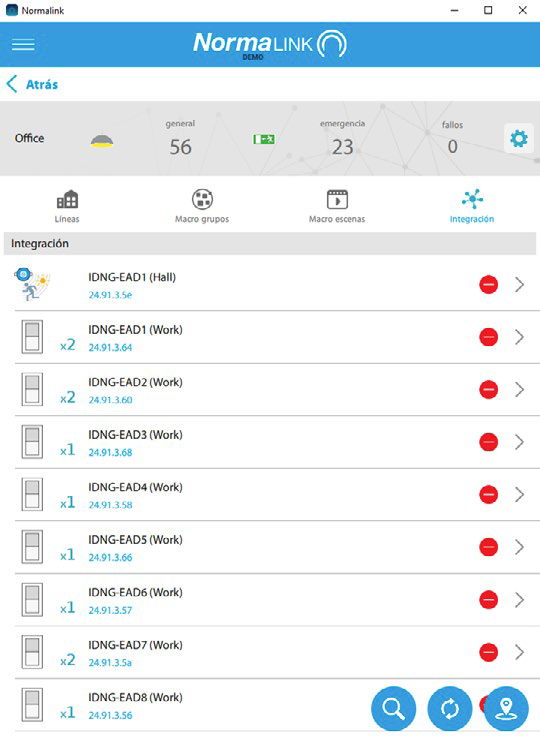
External elements such as push buttons, switches, light regulators or presence sensors can be integrated through the IDNG-EAD adapters or the IDNG-P4P interface. IDNG-EAD adapter can be used to integrate a push button, a light regulator or a presence detector. The IDNG-P4P can be used to connect up to 4 push buttons and associate them to 4 different actions.
From the "Integration" screen they will be detected and they can be configured.
When working with the IDNG-EAD, Normalink will ask you which type of device has been connected, how do we want it to work and which fittings will be involved in the action.
When working with the IDNG-P4P, we can choose the behaviour of each one of the 4 inputs and which group of luminaires they will activate.
In this screen you will also see all the terminals of the Input / output module that ? have been configured as inputs
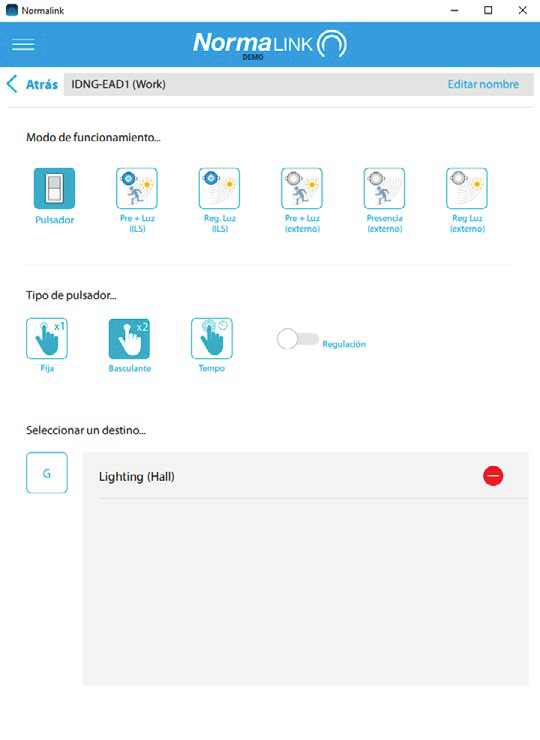
Push button. There are three different types:
- Fixed action. One press will activate one action (maximum level, turn off, execution of a scene...) over the selected froup of luminaires
- Swivelling action. A press will turn on to the maximum the selected group of luminaires and a second press will turn it off. Enabling the "Regulation" option, by pressing and holding will dim the lights up. A second press and hold will dim the lights down.
- Timed action. A press will turn on the selected group of luminaires for the pre-set duration.
Light regulator and detector.. There are two types:

- Normagrup brand (Blue color). You can connect up to 8 units per IDNG-64 gateway (using IDNG-EAD adapters).
- Any other brand (Grey colour). In this case there is a limitation of one per line (IDNG-64).
Remember that the light regulator has to be 0-10v and closed loop.
The master gateway IDNG-MG incorporates many functionalities. These are the most noteworthy:
- Modbus/IP support. In the web server of the gateway you can find the commands to control the installation through an external software, as long as this software is compatible with the Modbus/IP communication protocol.
- Notifications management. The master gateway incorporates a screen to configure the warnings and notifications of possible incidents in the installation through email.
- Normalink Cloud connection. By adding this gateway to any existing Normalink installation, you will be able to control it remotely through our free cloud service.
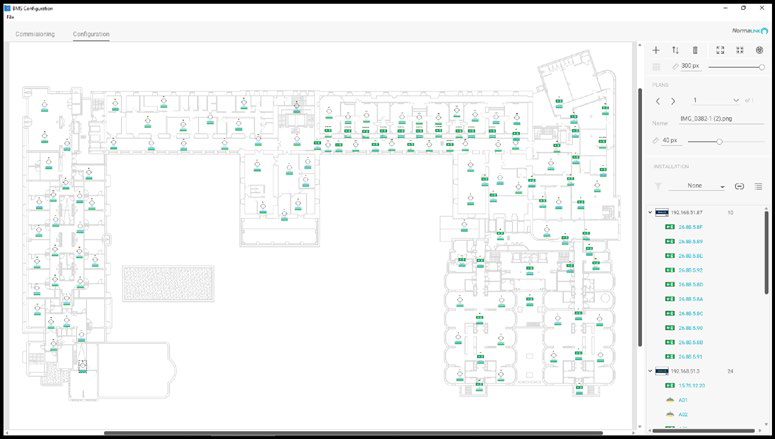
- Normalink BMS. If the project requires a more exhaustive control, within the gateway you will find the Normalink BMS software (Building management system). It is a control software with drawings with multiple possibilities that ensure the correct functioning of the installation at all times and to optimize the maintenance work
Youtube configuration guide
Video tutorials in youtube
Find the complete tutorials for Normalik configuration in our Youtube channel. Please follow this link:
